How to create a vision board
I’d never taken vision boards seriously. Perhaps even judging them a bit. But you can’t properly judge something if you haven’t actually tried.
Thankfully, for our first Mastermind group of the year we decided to shake things up and create vision boards together. Given the popularity of Marie Kondo’s ‘Tidying Up’ on Netflix, it was also the perfect time to go through my shelf of magazines I’d been hoarding.
STEP 1: Set a date, time, and place.
Vision boarding can be done in a group or alone. It’s actually nice to socialize while you do it. “Hey, I think this word is so you.” Plan on blocking 2-4 hours. (2 hours is a bit rushed, but it is do-able.)
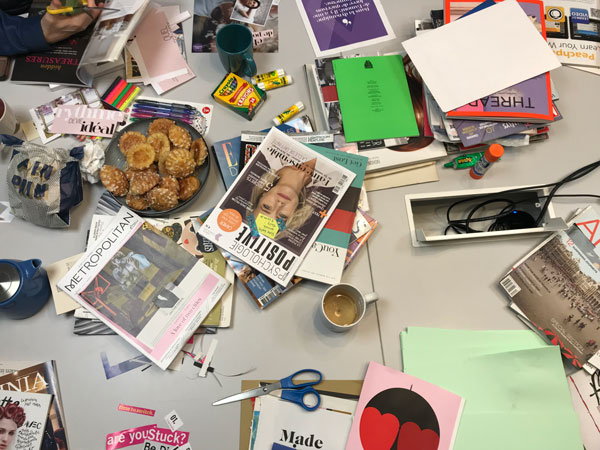
STEP 2: Collect the magazines.
Pull any magazines you have (even free ones). You can buy new ones, but it’s not necessary. The other perk of vision boarding with others is that you have more magazines to pull from.
STEP 3: Pull together supplies.
Poster board (cut it in half if it’s too big, not everyone has to create a board that’s the same size)
Magazines (most of mine were free airline magazines or design + travel magazines on my shelf)
Scissors (it’s good to have multiple pairs)
Glue sticks
Anything else you want to include
Playlist (optional)
STEP 4: Meet + cut out words and images
I love my magazines, so I wasn’t sure if I was quite ready to part with them. A couple days before our vision boarding session I sat on my floor and flipped through them, which meant I got an unintentional head start. One of my fears in vision boarding is that I’ve never really felt that most magazines speak to me or would have much I want to cut out. I was wrong. I got sucked in quickly. I also realized that there is some really awesome copy writing for ads. You really never know what you’ll find until you start. I came with an envelope full of words already, but then we set a timer for about an hour when we were all together to flip through magazines and look for inspiration. I found even more words during our Mastermind session.
STEP 5: Arrange it + glue it
Once you have everything cut out, it’s time to put it together, which is also a fun part of the process. The words and images were arranged one way in the magazine, but now you’re creating your very own layout that speaks to you. Set the timer for another hour—that way you won’t over-think it and actually will get it done. Don’t feel like you have to fill every bit of space either; sometimes in life we really do need the blank space and to learn to get comfortable with it.
STEP 6: Present your boards
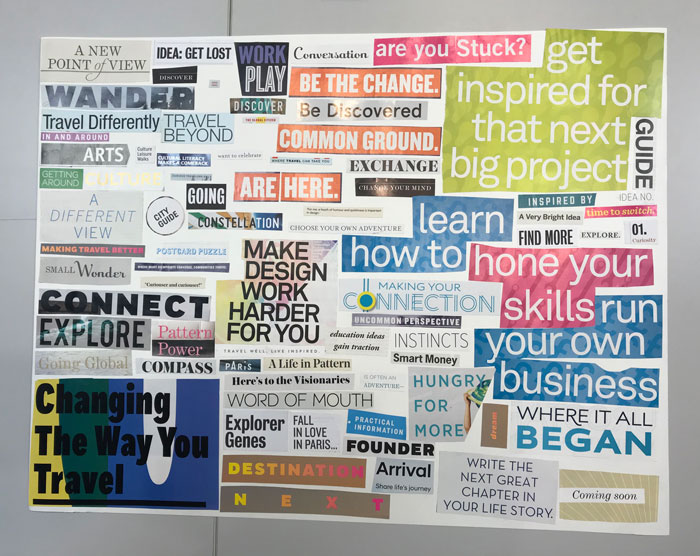
Everyone approaches vision boards differently. There’s no right or wrong way, so it’s nice to see what others come up with. It was funny, because mine ended up being all words, while others included a lot of imagery. It’s a good idea to put a date on it, because you can compare your boards over the years and see how you’ve grown, developed and changed.
STEP 7: Hang your vision board up at home in a place where you can see it.
Mine is behind my living room door which is rarely closed so my board isn’t always visible, but I do enjoy knowing it’s there.
STEP 8: Check in one month later
See how everyone has displayed or used their vision board. What are their reflections? How did the experience feel? Has the exercise helped?
I loved “make + do” as a kid so this ended up being a much better exercise for me than I expected.
Observations:
Tasks are often scary and daunting until you actually get started. Start.
It turns out there’s a reason I kept the magazines I had (almost all travel or design). It’s an interesting exercise to consider what speaks to you. (Perhaps my board has some bias towards my interests ;) ).
I tend to think short term (how I’m wired), but my goal is to start thinking more long term. This simple exercise is one step.
Don’t discount something until you try it.
It was an excellent exercise in copy writing, giving me lots of new leads on creative ways I can talk about my services.
The New Year is a good time to make a vision board, but January is over. There’s do better time than now.
There’s no one way—or right way—to make a vision board. Everyone has their own approach. I put this post together in hopes that it may inspire you to make one too. Use these steps as a basic guideline, but adapt them however you see fit. What’s most important is a) you do it, and b) have fun when you do!
What are your experiences with vision boards? Share them in the comments!
This is how my 2019 [first ever] vision board turned out:
** NEW! I’ve launched a vision board workshop. Sign up here! **